

In this article, we will discuss how to set up, test and view analytics of automatic mailings on the BorisBot.com platform. At the end of the article, you will find links to ready-made bot templates with configured automatic mailings.
Mailing is a scheduler of messages that are sent to one user or a group of people according to a planned scenario omni-channel (to the channels that users have).
For example, you have created a bot that registers users for a webinar. To increase the attendance of participants, it will be useful to remind them of the event several times: 1 day, 1 hour and 5 minutes before the start. A message scheduler will come in handy for this.
Messages can be sent to different communication channels: email, SMS, messengers.
How to set up mailing
Open the Mailing section in the left menu of the designer, add a new mailing and name it.
Step 1. Trigger action
To help the bot understand when to start a chain of messages, set the trigger action — hitting a segment.
Hitting a segment starts a series of messages to a group of users that matches a certain feature. For example, all users registered for a webinar will receive scheduled messages with a reminder about the event.
You need to create a segment in the script scenario. All segments and users are in the Segments section.
Step 2. Sending time
A bot sends messages at the scheduled time and sequentially: first the first message in the chain and then each subsequent one strictly after the previous one.
Click Add message and set the Sending time:
Immediately — message will be sent as soon as a user enters the segment or performs an event
On a specific day — a message will be sent on the specified date and time (one-time, without repeating the following year)
In hours and minutes — a message will be sent in the specified hours and minutes
In days — a message will be sent in the specified number of days at the specified time
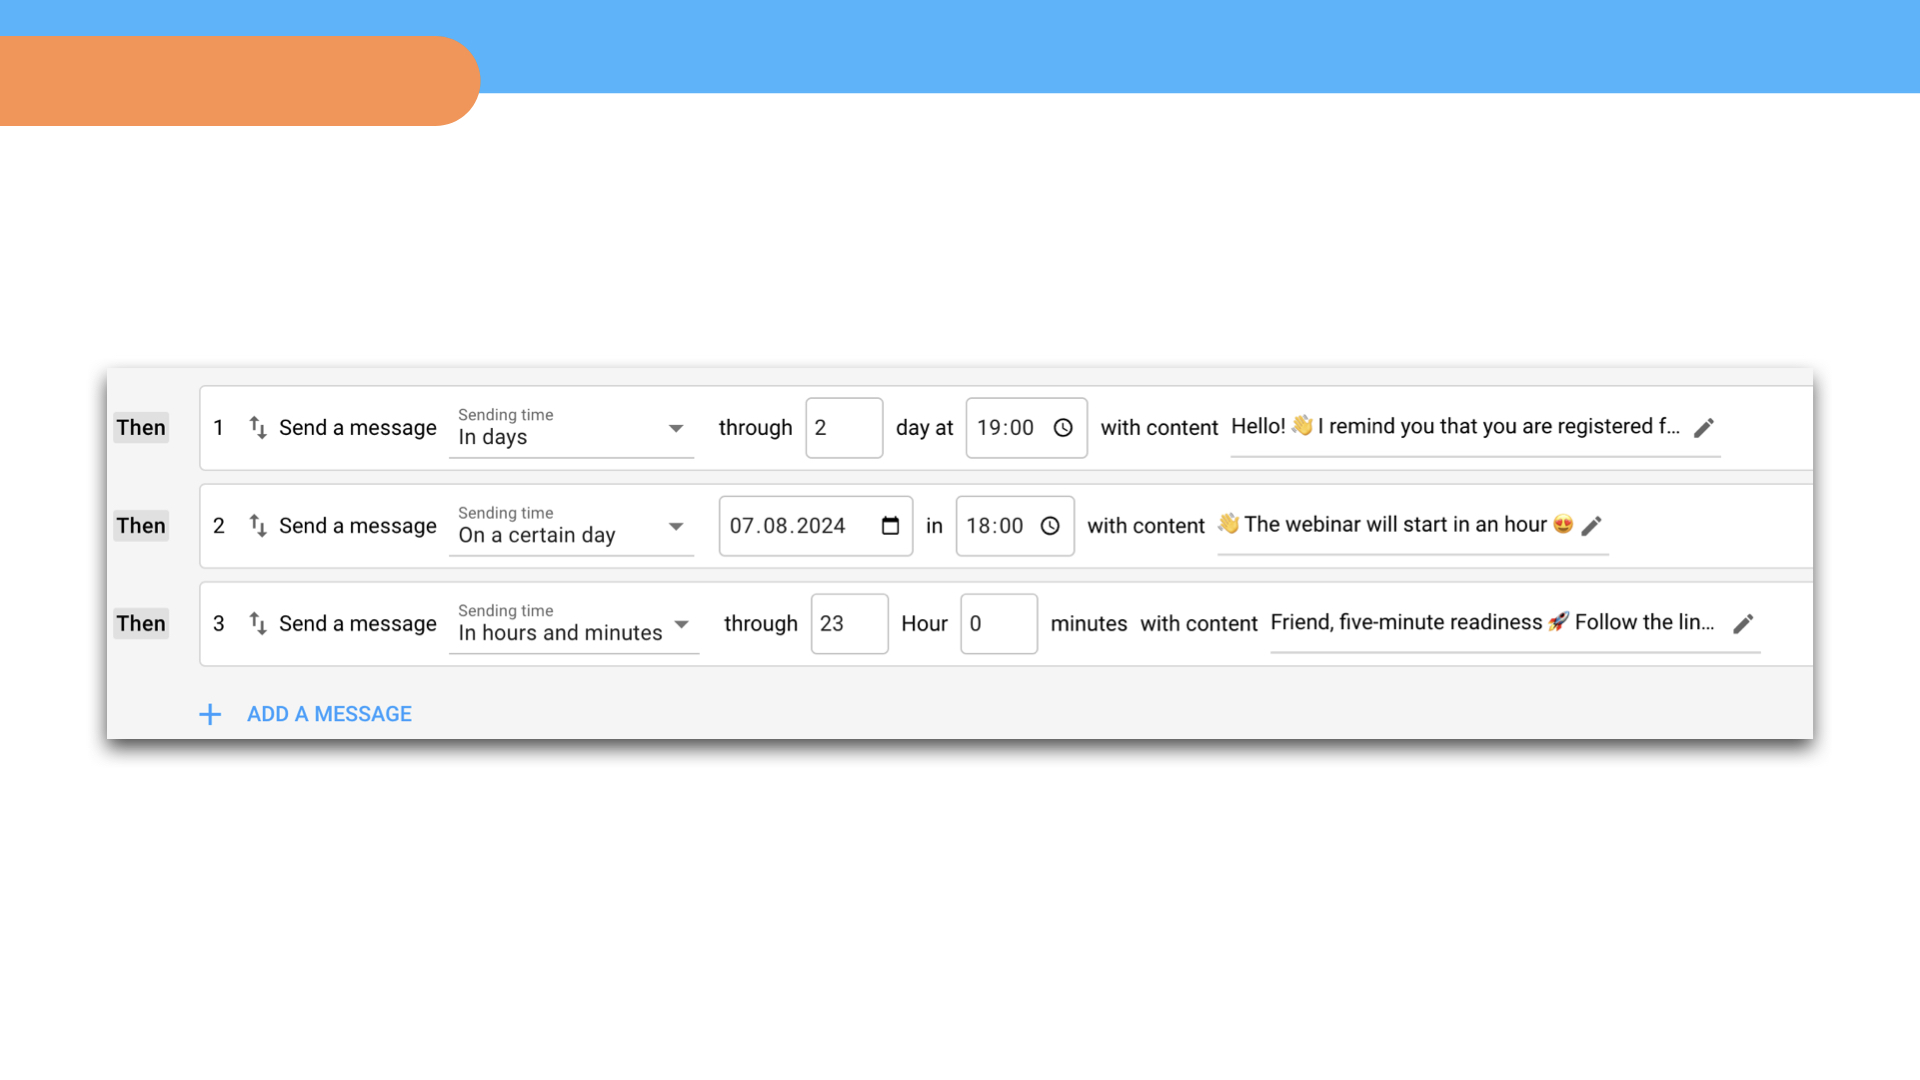
⏰ The sending delay is calculated from the previous message in the mailing list. For example, if you plan to send a message 15 minutes after the previous one, then the delay time should be calculated from the previous message in the mailing list, and not from the first one.
Step 3. Messages
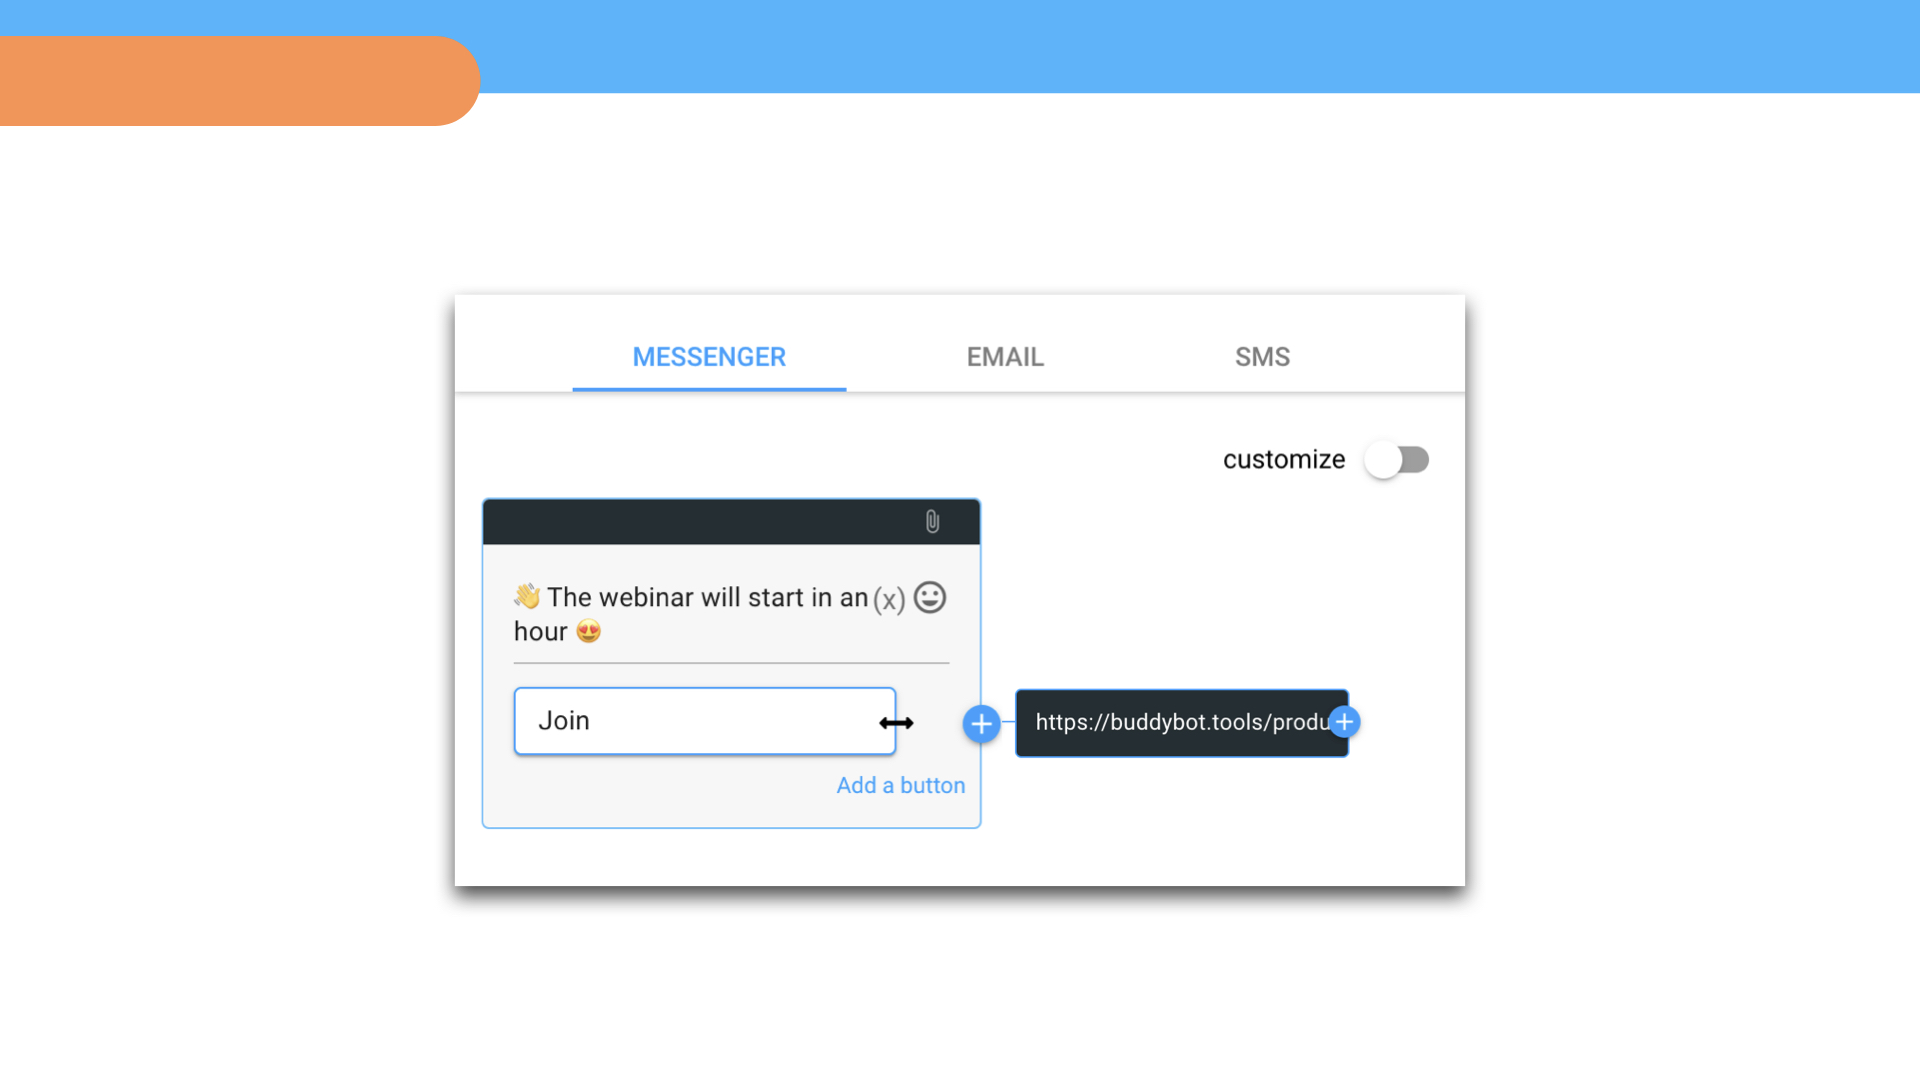
You can use text, emoji, images, files, action buttons, buttons with an external link, global variables in messages.
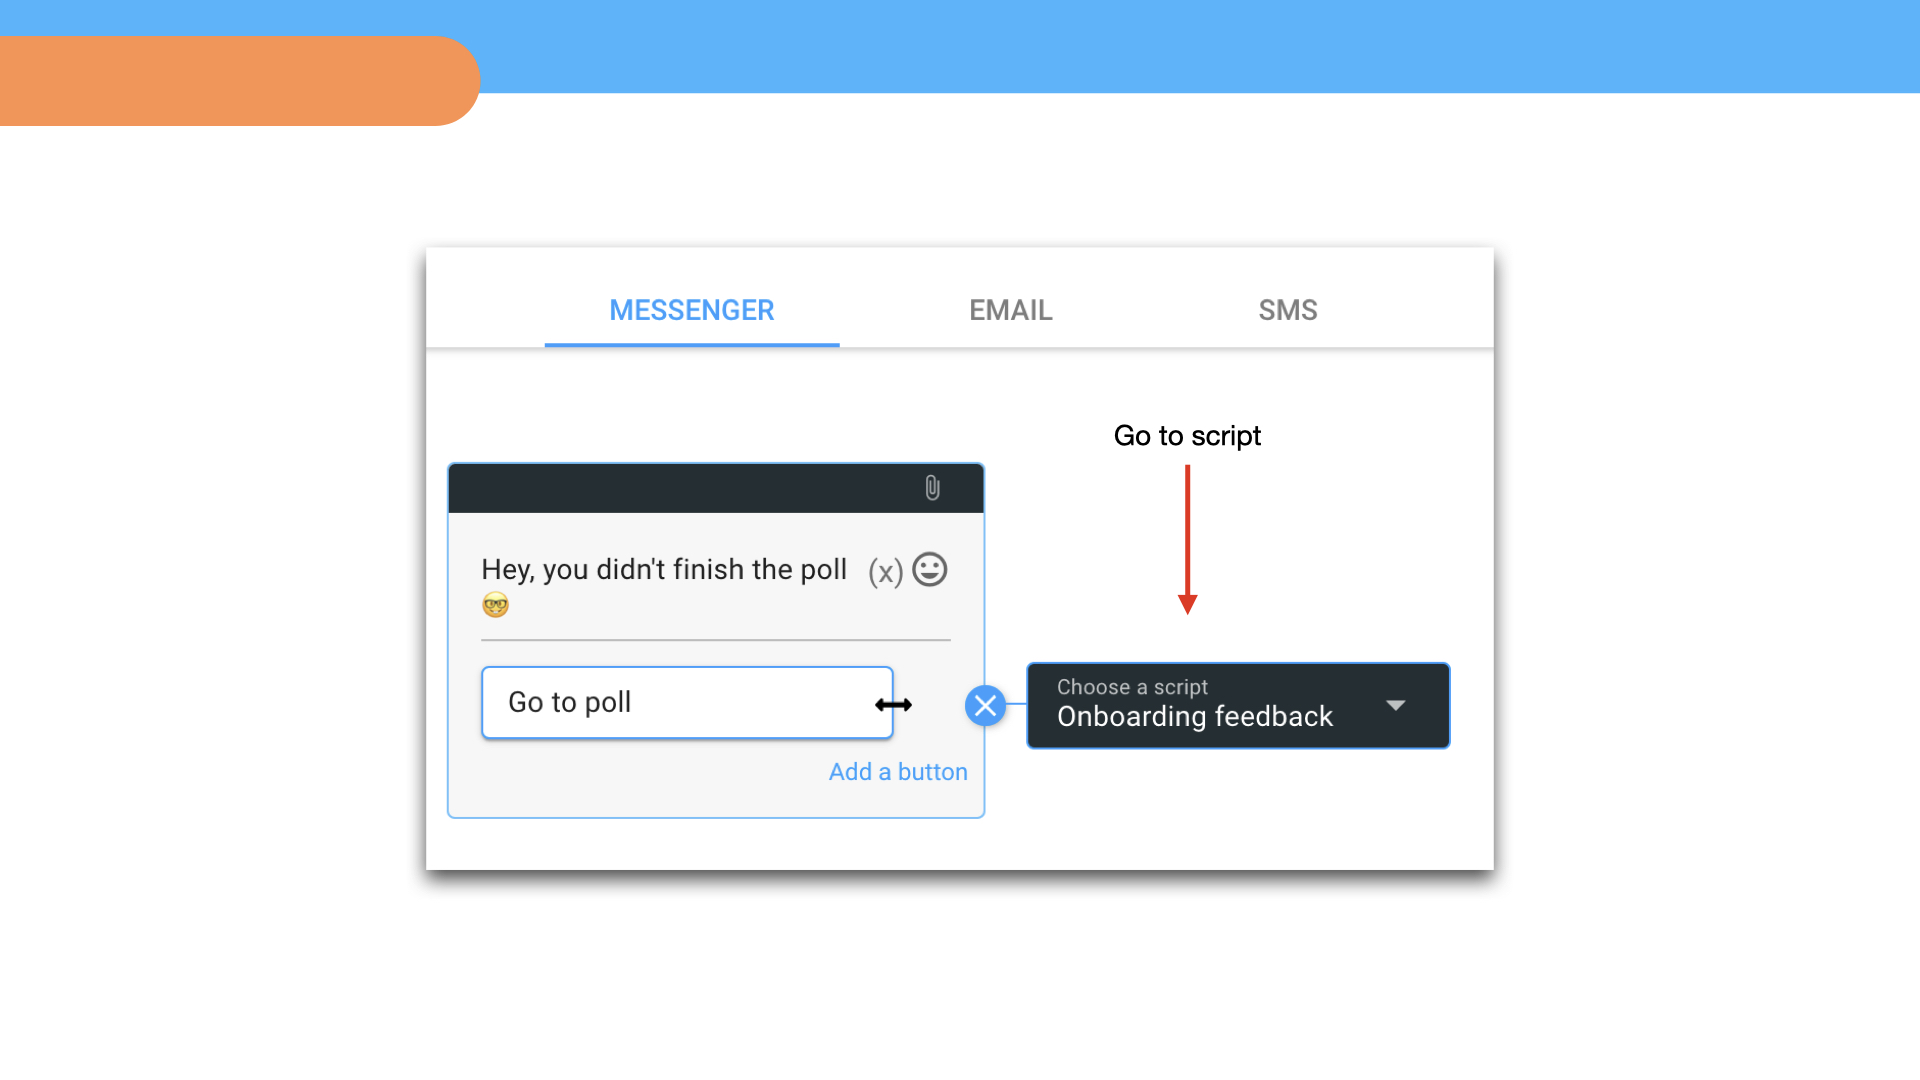
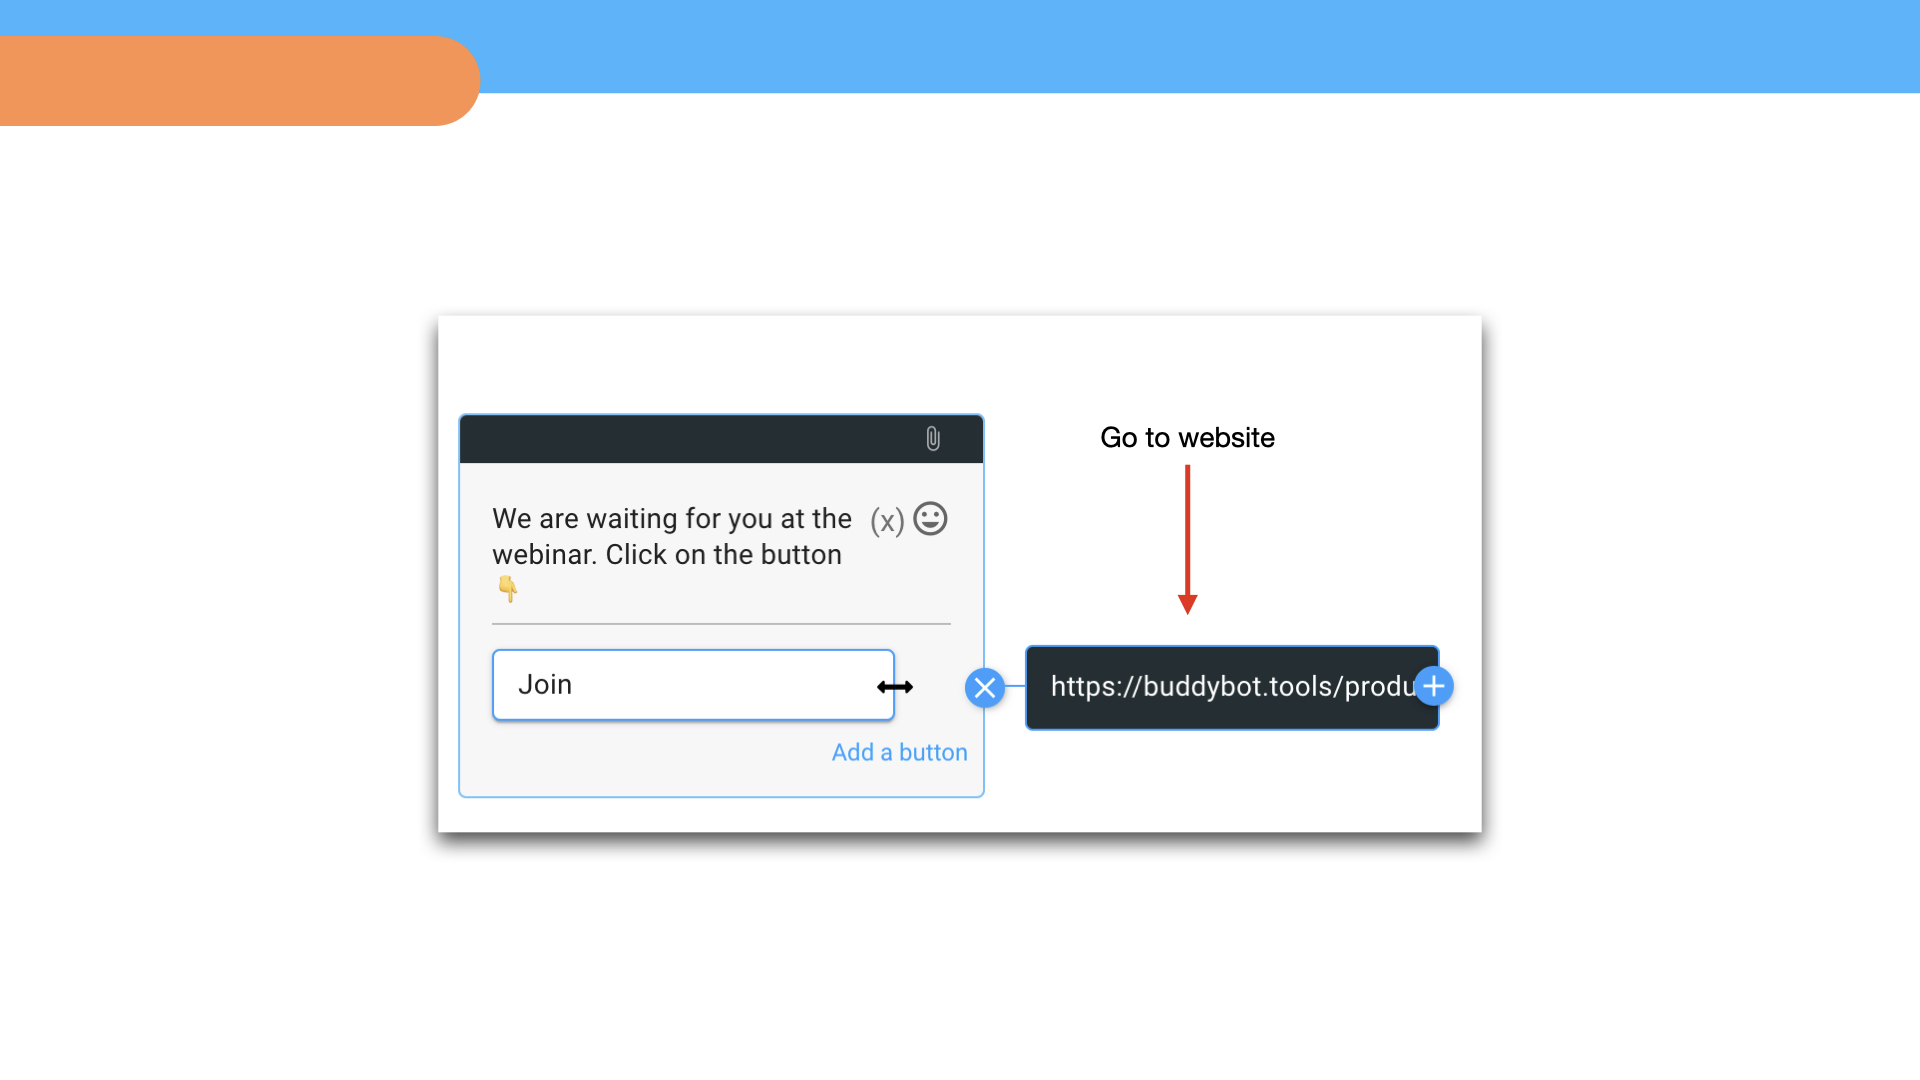
Click Customize message, add text to the «body» of the message and to the buttons. The buttons can be left empty, in this case a user will receive messages without any call to action. To continue a script from the mailing list message, add an extension to the button — Go to script or Perform action.
The Go to script extension will direct a user to a separate script. For example, if you want to send a message asking to take a survey, you need to add a transition to the survey script to the button. When a user clicks the button, a bot will direct him to the specified script.
The Perform action extension allows a user to call, visit a website, add a product to the cart, etc. after clicking on the button. For example, you can add a link that will take a webinar participant to the webinar room directly from the mailing list.
You can create a single message that will be sent by omni-channel: messenger, email, SMS. A message is automatically adapted to the interface of each channel. In the SMS channel, the content of the button comes as a link.
If you need to send different messages, enable the Customize box and add unique text for the channel.
You can also design a letter template for the Email channel using HTML. To open the template editor, enable the PasteHtml box.
Step 5. Launching mailing
If everything is ready, click Launch mailing in the upper right corner of the editor.
If you stopped the mailing, you can restart it using the same button. The bot will resend messages to everyone in the segment.
Step 6. Stopping mailing
If you launched a series of messages, and at some point a user performed the target action, then the subsequent mailing for him can be stopped using the stop segment.
Example. We planned a mailing of five «warming messages», the purpose of which is to purchase a product. In each message, we added a button that takes a user to the scenario where they can find useful content and then pay for the product/service. If by the third message the user has already decided to buy and bought your offer, then there is no need to continue the mailing. For such users, you can create the Paid segment so that the bot stops sending messages to everyone in this segment.
The stop segment must be added to the Stop mailing line. Set up this step in advance, before launching mailing.
To stop mailing for all users, click Stop Mailing in the upper right corner of the editor.
Testing mailing
- Set the time for sending the first message – immediately or in a few minutes
- Run the script in which you add users to the desired segment, or perform an event
- Check in the Segments section whether you got into the desired segment
- Wait for a mailing message and return the original time in the settings
Mailing analytics
In the Mailing section, you can track quantitative indicators: messages in the sending queue, sent messages, viewed messages, the number of unsubscribed users and activations.
More detailed statistics can be viewed by clicking on the numbers inside the mailing list – the bot will automatically upload statistics for each message to the table.