


How does it work?
Launch the bot.
The bot is embedded into a website as a widget and is activated when a visitor performs an action on the website: opens or scrolls a page, clicks on an element, etc. The bot offers to sign up for a free webinar, saves the user’s contact and sends you notifications about new registrations.
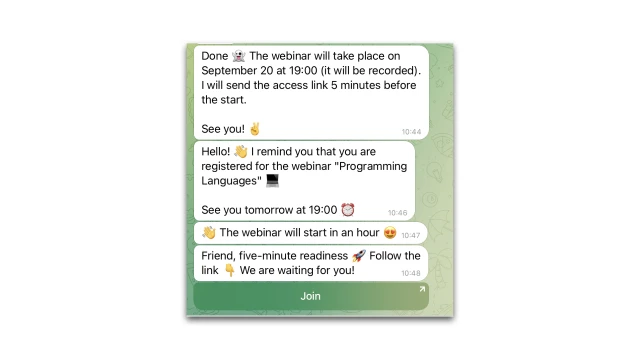
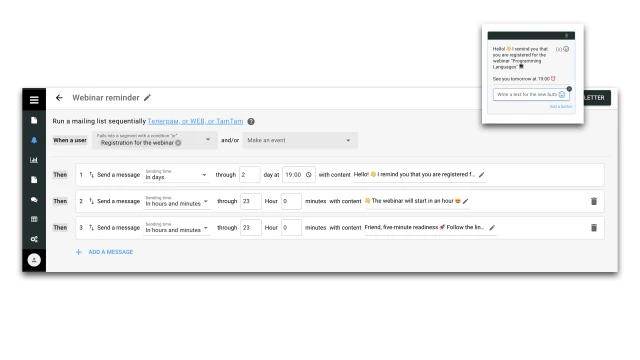
Then, at the scheduled time, the bot sends reminders about the webinar: 1 day, 1 hour, 5 minutes before the start.
How to set up the bot?
Create a project in the constructor and copy this template. A script, newsletter and segment will appear in your project.
Set up the script.
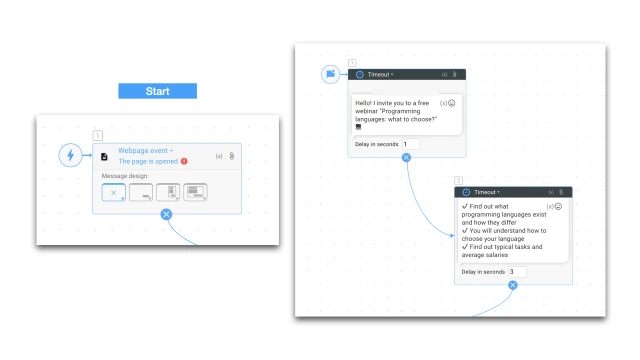
1. Place the widget on the site and configure the constructor to launch a trigger message based on an “Event on the site.”
2. The script must begin with the “Event on the site” block. Create a new script and add this block, select the block type and message design.
3. Think about the offer that you will offer to a site visitor. Add relevant texts and media to the script.
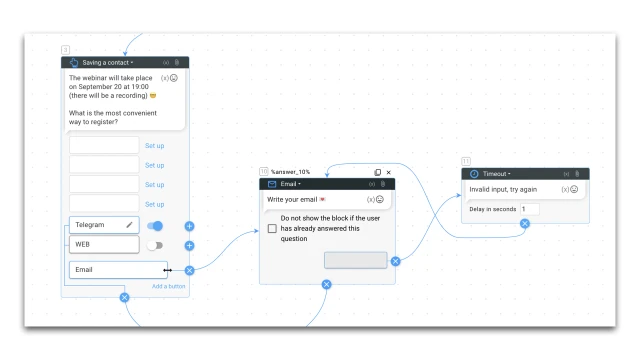
4. Add the “Save contact” block. You can disable/enable different communication channels: Telegram, email, telephone.
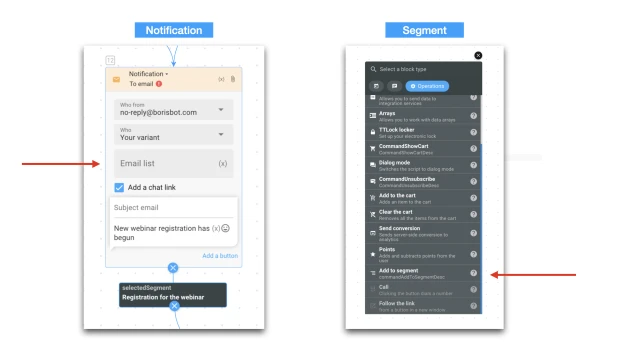
5. Add a “Notification” block and specify the email to which the bot will send you messages about new applications.
6. Add a user segment for sending messages through the “Create block” → “Add segment” action.
Set up newsletter.
Specify the time of mailing and add your texts that participants will receive. The newsletter starts when the user enters the segment. In our example, the segment is assigned to the “Notification” block.
And one last thing.
1. Set up the messenger in the “Settings” → “Messengers” section.
2. In the “Settings” → “Bot Design” section, add a background and avatar for the web version of the bot.
If you have any questions about setting it up yourself, write to the Telegram community.