How does it work?
You create a bot and set up to accept payments internally using Stripe's service. During a dialogue with the bot, a user selects a product/service and adds it to the cart.
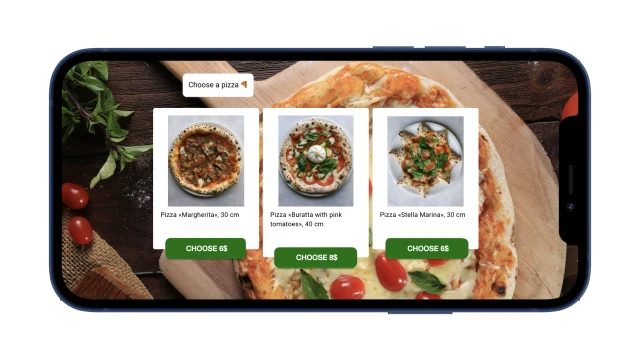
A payment page is opened with the amount and fields for entering bank card details. A user enters data and confirms the payment. When a payment response arrives, the bot automatically continues the dialogue script.
Payment in the bot can be used in the browser and instant messengers.
How to set up the bot?
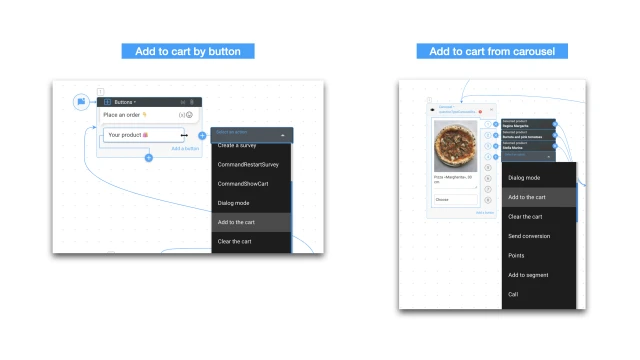
Create a project in the designer and copy this template. Two scripts will appear in your project. In one script, an example is set up when a user adds a product to the cart from the product carousel, in the other — using a button.
Set up the bot script.
1. This could be a bot store, a bot for warming up the audience and placing an order, or any other scenario where you need to pay for a product/service.
2. To add an item to your cart, select the “Add to cart” action. Next, the “Add Product” window will appear — enter the name, cost and description of the product/service. If necessary, add other products.
Set up payment acceptance.
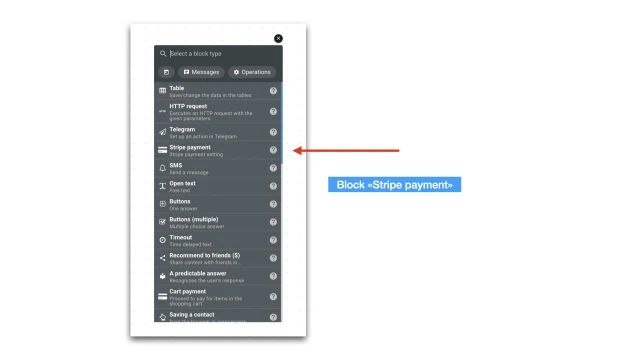
1. The next step is to select the “Stripe Payment”.
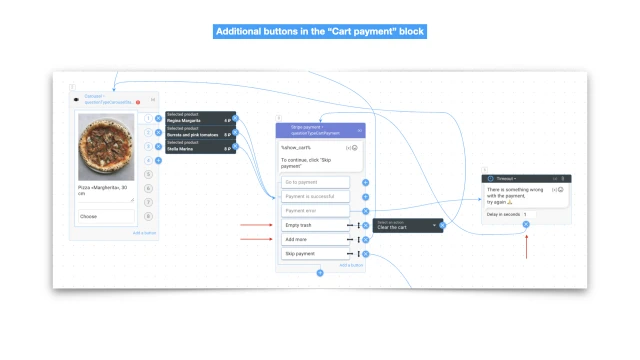
3. In the block “Cart payment” add the possibility to clean the cart. To do this, add a button and through “Perform action” select “Clean the cart”.
4. To the “Payment error” button, add a hint for a user that an error has occurred. To do this, use the Timout block.
5. If necessary, add the possibility to return to goods/services so that a user can supplement the cart. To do this, add a new button in the “Cart payment” block and send an arrow to the block with the goods.
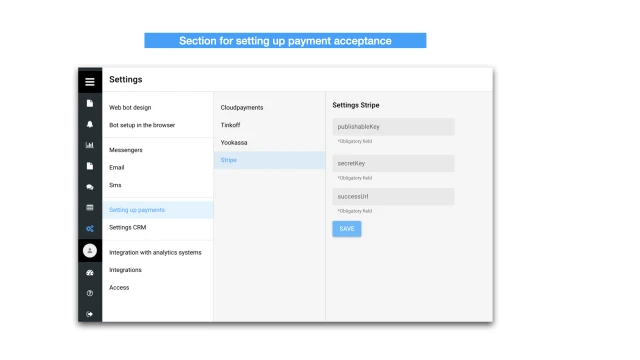
2. Go to the section “Settings” → “Payment acceptance” and configure the Stripe according to the instructions.
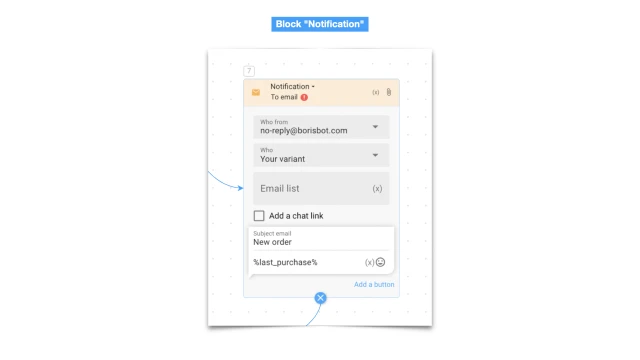
Add a notification about a new payment.
You can receive reports about each new payment by mail. To do this, add the “Notifications” unit, indicate your email. Add a variable % Last_Purchase % to the body of the block – the last purchase.
And the last one.
1. If you plan to use the bot in the messenger, configure the appropriate messenger in the "Settings" section.
2. In the section “Settings” → “Bota Design” add the background and avatar for the WEB version of the bot.
If you have questions about independent setting — write to the Telegram community.
 Talpha


